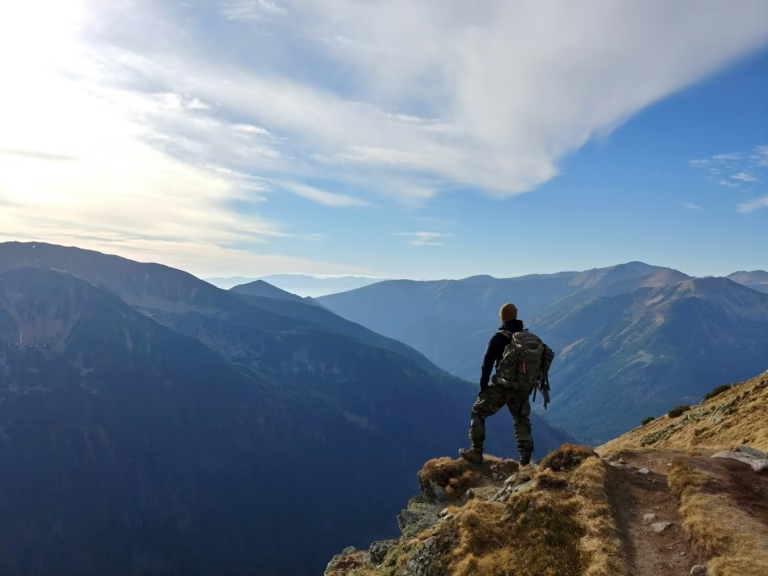
A poorly packed backpack can ruin a perfectly good hike. Too much weight on one side, and your shoulders compensate in ways your back will complain about for days. Critical gear buried at the bottom means stopping and unpacking mid-trail just to grab your rain jacket. And if you brought too much stuff to begin with, none of the organizing in the world will make that pack feel good at mile ten.
Knowing how to pack a hiking backpack properly is one of those skills that looks simple from the outside but makes a measurable difference once you get it right. Weight distribution, layering logic, and strap adjustment. These aren't just tips for ultralight gear nerds. They're practical techniques that reduce fatigue, keep you moving efficiently, and make sure the things you need most are always within reach.
Whether you're prepping for your first day hike or tightening up your system for longer routes, these six tips cover the best way to pack a hiking backpack from the ground up.
The Basics of Packing a Hiking Backpack
How you pack should reflect where you're going and for how long. Both factors change what you bring and how you organize it.
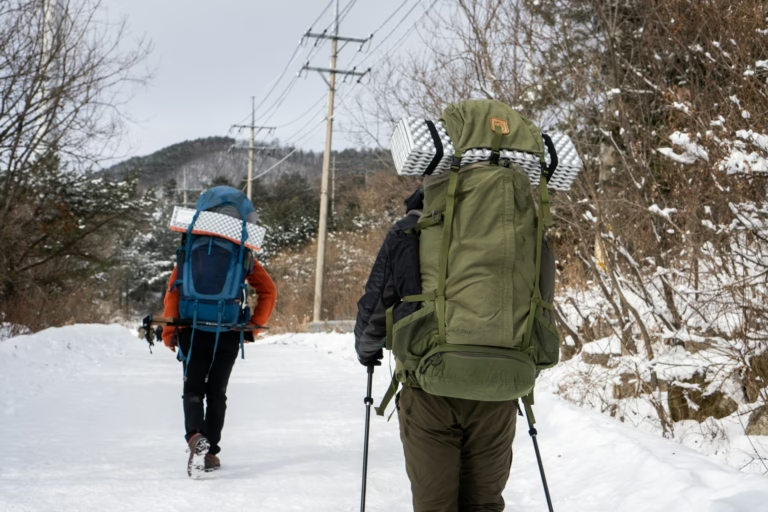
On a day hike, your pack is relatively light, and you'll likely access it a handful of times. On a multi-day trek, you're managing more gear across more hours, and the comfort cost of poor weight distribution compounds with every mile. A 20-liter daypack and a 65-liter multi-day pack aren't just different in size. They require different packing logic entirely.
The other baseline question is what your specific trail requires. A high-alpine route in variable weather needs a rain layer accessible at the top of the pack and extra insulation that a summer forest trail doesn't. A desert hike prioritizes water capacity over almost everything else. Knowing your route before you pack means your gear choices and organization reflect actual conditions rather than a generic checklist.
6 Pro Tips for Packing a Backpack for Hiking
Packing a backpack for hiking well comes down to a handful of principles applied consistently. Each tip below addresses a specific part of the process, from what you put in the bag to how the bag sits on your body.
Tip #1: Prioritize Essentials and Cut What You Won't Actually Use
The lightest item you can carry is the one you left at home. Minimalism in hiking isn't about suffering. It's about being honest with yourself about what you'll actually use versus what feels reassuring to pack but adds dead weight.
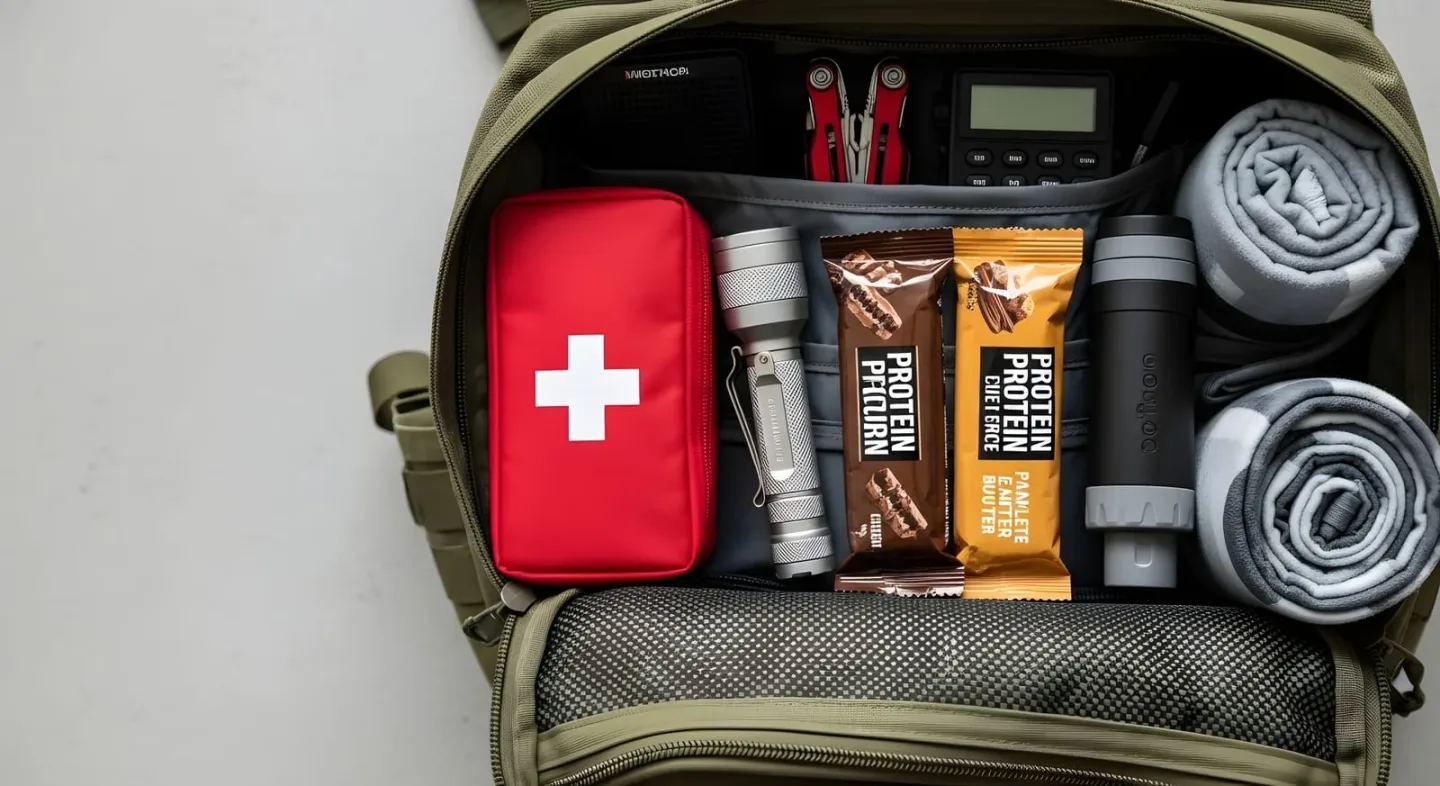
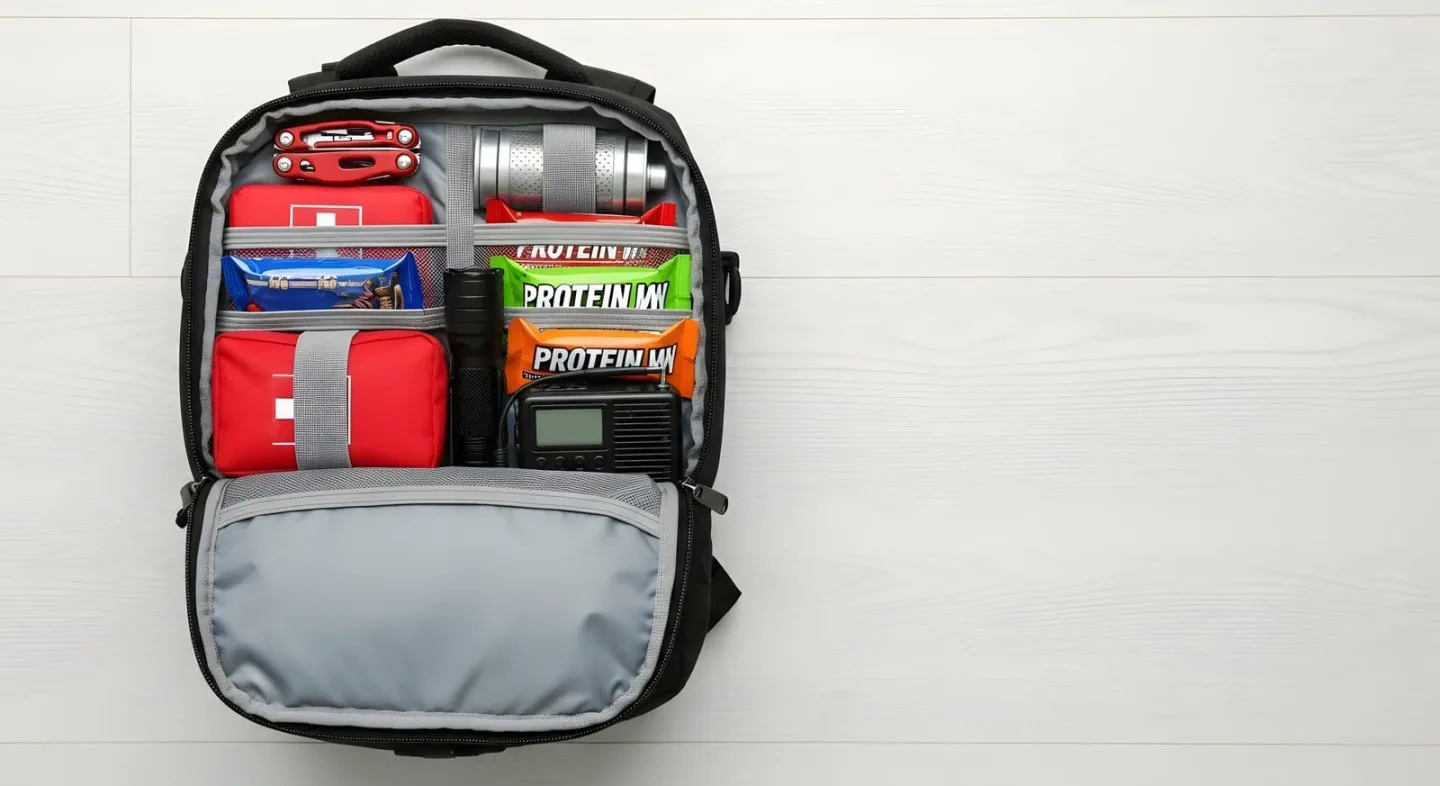
Start with the non-negotiables: water and a way to purify more, food for the duration, plus a small buffer, a first aid kit, navigation tools, and weather-appropriate layers. Everything else gets evaluated against a simple question: will the absence of this item create a real problem on the trail?
Start with the ten core categories that cover every hiker's baseline: navigation, sun protection, insulation, illumination, first aid, fire starting, repair tools, nutrition, hydration, and emergency shelter. These categories, not specific products, are what you should be packing. How you fill each one can be as minimal or as thorough as your trail demands.
Getting this right matters more than most casual hikers realize. A study published in PubMed on long-distance Appalachian Trail hikers found that 61% of respondents reported musculoskeletal complaints, and those who did not train before their hike were nearly three times more likely to get injured than those who did. Carrying more weight than your body is conditioned for is a direct contributor. Bringing only what your trail genuinely requires is not optional minimalism -- it's injury prevention.
For day hikes, a 20-35 liter pack is usually sufficient. For overnight trips, 35-50 liters. Multi-day expeditions typically need 50-70 liters. Overpacking a larger bag than you need is a common mistake. A 70-liter pack filled for a day hike is both heavier and more awkward than a properly loaded 25-liter pack.
Tip #2: Pack Your Gear in Layers, Not in Piles
The layering principle for how to pack a backpack for hiking is straightforward: what you need least goes in first (bottom), and what you need most goes in last (top) or in external pockets. In practice, this creates three zones inside the main compartment.
- Bottom zone: Sleeping bag, sleeping pad if it fits internally, camp shoes, and anything else that only comes out at camp. Compress these items and pack them tight to create a stable base.
- Middle zone: The heaviest items in your pack belong here, positioned as close to your back as possible and centered vertically. Food, cooking equipment, and water, when carried internally, should all sit in this zone. Weight that rides close to your spine and near your center of gravity creates a more stable, less fatiguing load than weight packed toward the outside or the top.
- Top zone: Items you'll access on the trail without stopping, such as snacks, sunscreen, a light layer, your phone, or a map. Pack these loosely enough that you can grab them in seconds.
External pockets are not overflow storage. They're specifically for things you need fast: water bottles in side pockets, a headlamp and hand sanitizer in the top lid pocket, and your first aid kit in a consistent spot you don't have to think about.
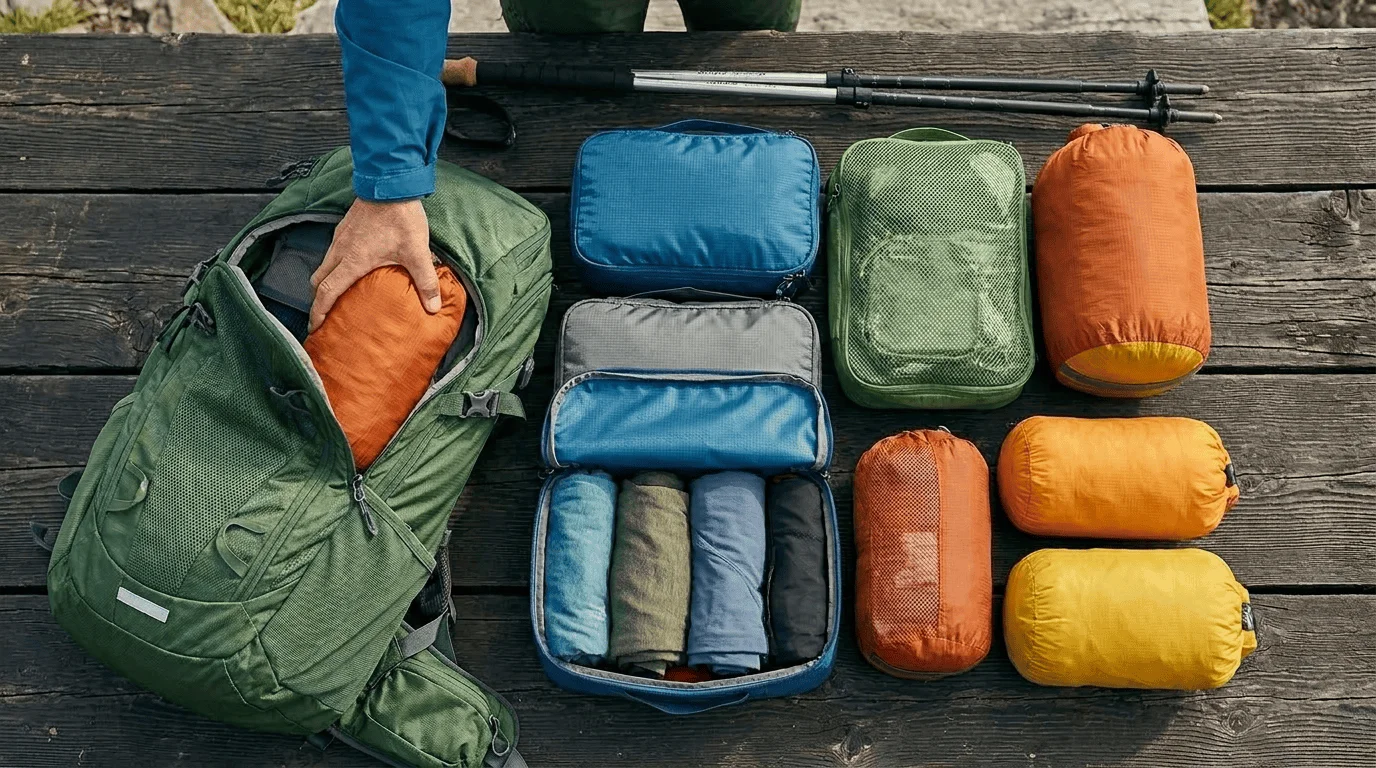
Tip #3: Use Packing Cubes and Stuff Sacks to Stay Organized
Dropping loose clothing and gear into a large pack without any organization system creates a situation where finding anything requires unpacking everything. Packing cubes and stuff sacks solve this without adding meaningful weight.
The approach that works well for most hikers:
- One stuff sack for clothing: base layers, socks, and a mid layer compressed down and placed in the bottom or middle zone
- One waterproof dry bag for anything that can't get wet, such as your sleeping bag, electronics, and documents
- One small pouch for first aid and repair items, kept in the same spot every trip, so you're not searching in an emergency
- Mesh stuff sacks for food, which are visible, ventilated, and easy to check before leaving camp
Color-coding helps. It sounds trivial until you're searching a dark pack at 5 am for your headlamp. Consistent placement matters more than the specific system. The best approach to packing a backpack for hiking is the one you can replicate trip after trip without thinking it through from scratch.
- Tip: Roll clothing instead of folding it before putting it in a stuff sack. It compresses better, resists wrinkles, and takes up noticeably less space in a tight pack.
Tip #4: Weight Distribution Makes or Breaks Comfort on the Trail
Even with the right gear and a solid layering system, a badly balanced pack will beat you up over a long day. Weight distribution affects your posture, your gait, and the cumulative strain on your lower back and hips.
The principle is simple: heavy items should be centered vertically in the pack and sit close to your back. Light and bulky items go toward the outside and top.
Here's a quick reference for the best way to pack a hiking backpack by zone:
| Pack Zone | What Goes Here | Weight Category |
| Bottom | Sleeping bag, camp shoes, soft layers | Light, bulky |
| Middle (against back) | Food, water, stove, heavy gear | Heaviest items |
| Middle (away from back) | Clothes, tent body | Medium weight |
| Top | Rain jacket, snacks, first aid | Light, frequently needed |
| External pockets | Water bottles, trekking poles, sunscreen | Light, immediate access |
Side-to-side balance matters too, not just top-to-bottom. If you're consistently carrying more weight on one side, your body will compensate with a subtle lean that compounds over miles. When loading your pack, check lateral balance consciously. It's easy to overlook and surprisingly common.
Tip #5: Every Pocket, Loop, and Strap Has a Job
Most hikers underuse the external organization built into their packs. Side pockets, hip belt pockets, top lid compartments, compression straps, and lash points all serve specific purposes, and using them properly makes the pack smarter without making it heavier.
- Side water bottle pockets should hold exactly that: water bottles, kept accessible without removing the pack. If your pack has two, use the second for a snack, a trowel, or a lightweight packable layer.
- Hip belt pockets, where present, are ideal for small items you want without stopping: lip balm, a camera, energy chews, your phone. They also distribute a small amount of weight onto the hip belt itself, which is where most of a well-fitted pack's load should sit anyway.
- Top lid compartments are for first-access essentials: headlamp, hand sanitizer, permits and trail maps, a lighter, and any medication you might need mid-hike.
- External compression straps and lash points handle bulky items that don't fit inside, such as trekking poles stowed vertically, a wet rain jacket strapped outside to dry, or a sleeping pad lashed across the bottom. Keep anything strapped externally secured tightly. A loose sleeping pad swinging off the back of a pack is a balance hazard on narrow trails.
Tip #6: Fit Your Pack to Your Body Before You Hit the Trail
The best-packed hiking backpack in the world still performs badly if it doesn't fit. An improperly fitted pack shifts weight onto your shoulders instead of your hips, which is exactly where you don't want it. Shoulders tire faster and have less structural capacity for load-bearing than the hip girdle.
Setting Torso Length First
Most packs above 30 liters are sized by torso length, not overall height. Measure your torso from the iliac crest (the top of your hip bones, found by pressing your hands on your hips) up to the C7 vertebra at the base of your neck. This measurement should match the pack's listed torso range. Many packs have adjustable torso lengths, and this should be set before adjusting anything else.
Loading the Hip Belt and Shoulders
The hip belt should wrap around the top of your hip bones, not your waist, and approximately 70-80% of the pack's weight should transfer through it to your hips. Tighten the hip belt first, before touching the shoulder straps.
Once the hip belt is set, bring the shoulder straps snug against your shoulders. They should contact your shoulders along their full length without gaps, but shouldn't be carrying the primary load. Load lifter straps (the short straps angling from the top of the shoulder straps back to the pack) should sit at roughly a 45-degree angle when adjusted correctly.
The sternum strap goes last: positioned across the chest at a comfortable height, snug but not tight enough to restrict breathing. Its job is to stabilize the shoulder straps laterally, not bearing load.
- Note: Recheck all adjustments after 10-15 minutes of walking. Straps settle as you move, and the pack shifts slightly to its natural riding position. A quick retighten after the first stretch of trail is standard practice.
Practice at Home, Not at the Trailhead
The six tips above work together as a system. Cutting unnecessary gear, layering by access and weight, using organizational tools, balancing the load, using all your pack's features, and fitting it properly each matter on their own. Applied together, the difference is significant.
Running through the full process at home before a trip rather than in a parking lot at the trailhead gives you time to catch problems: gear that doesn't fit where you intended, a weight imbalance that shows up when you actually put the pack on, or something essential you forgot. It also gives you a chance to weigh the loaded pack.
Research published in PubMed consistently links a higher backpack-to-body-weight ratio with a greater risk of musculoskeletal injury on the trail, and keeping your pack under 20% of your body weight is a practical threshold worth checking before you leave.
Knowing how to pack a hiking backpack the same way before every trip makes the process reliable rather than something you have to think through from scratch. That consistency, more than any single trick or product, is what separates hikers who arrive at camp feeling good from those who arrive exhausted.
Frequently Asked Questions
How to pack an overnight hiking backpack for maximum comfort?
Use the three-zone system: sleeping bag and camp items at the bottom, heavy gear centered and close to your back in the middle, and frequently needed items at the top. Set your torso length and hip belt fit before leaving home. As a general guideline, try to keep an overnight pack's total weight at no more than 20% of your body weight.
How to pack clothes in a hiking backpack to save space?
Roll clothes instead of folding and compress them into a stuff sack. Place camp layers you won't need until you stop in the bottom zone, and use softer clothing pieces to fill gaps around heavier central items. On multi-day trips, merino wool base layers can be worn for multiple days without becoming unpleasant, which cuts total clothing volume significantly.
Should I pack by weight or accessibility first?
Both apply to different parts of the pack. Weight distribution logic governs the main compartment: heavy items close to your back and centered. Accessibility logic governs external pockets and the top of the main compartment. These work in parallel rather than in competition with each other.
How tight should my straps be when I pack a hiking backpack?
The hip belt should be snug around the iliac crest with no gap. Shoulder straps should contact their full length without pinching. Load lifters should angle at roughly 45 degrees. The sternum strap should be comfortable without restricting breathing. If anything feels like it's cutting off circulation or forcing your posture into an unnatural position, loosen and readjust rather than pushing through it.
What gear should I prioritize in my hiking backpack?
Cover the ten core categories first: navigation, sun protection, insulation, illumination, first aid, fire starting, repair tools, nutrition, hydration, and emergency shelter. Beyond these, let your specific trail conditions guide what earns a spot. Weather forecast, distance from help, terrain type, and time of year all shift the priority order on any given trip.