Choosing the right backpack is not just about picking a size-it depends on how the pack fits your body, the type of gear you carry, and the kind of trip you’re planning. Two backpacks with the same volume can feel completely different depending on how they distribute weight and how efficiently your gear is packed.
A well-chosen backpack improves balance, reduces fatigue, and allows you to move more naturally on the trail. This guide provides a step-by-step decision process to help you understand backpack sizing, fit, and key features so you can choose the right pack with confidence.
What actually affects backpack size?
Even for the same trip duration, your backpack size can vary significantly depending on:
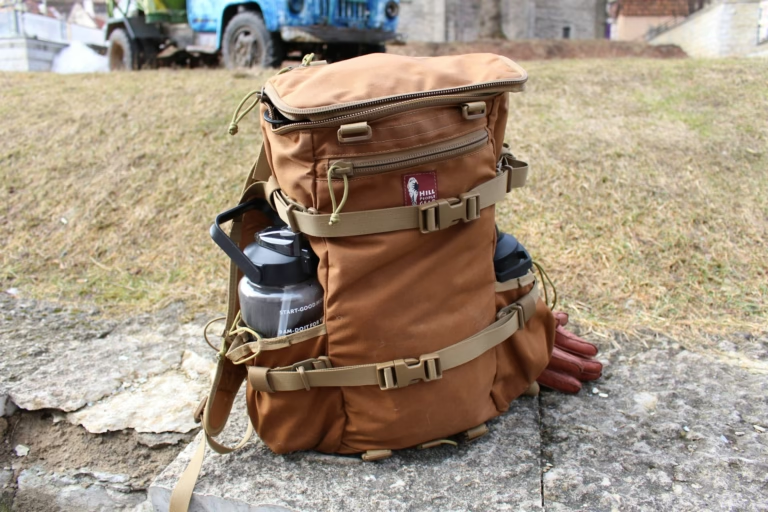
- Minimalist vs bulky gear: Ultralight setups reduce volume, while traditional gear such as tents, thicker sleeping bags, and cooking systems require more space.
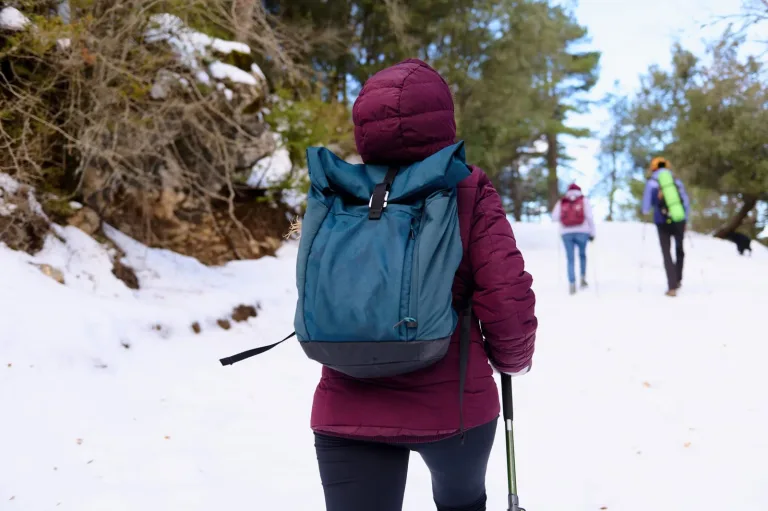
- Seasonal differences: Summer hikes require lighter clothing and less equipment, whereas winter hikes demand insulation layers, bulkier sleeping systems, and additional safety gear.
- Packing efficiency: Compression sacks and proper organization reduce volume, while inefficient packing increases required capacity.
This is why trip length alone is not enough when deciding what size backpacking pack you need-your overall setup matters just as much.
Backpack size: trip length vs gear volume
Backpack sizing is often simplified to trip length, but in practice, gear volume, packing style, and seasonal conditions all play a major role. Two hikers on the same trip may require completely different backpack sizes depending on their equipment and experience level.
Backpack size chart (by trip type)
| Trip Type | Duration | Recommended Size |
| Day trips | 1 day | 15–30L |
| Weekend trips | 1–3 nights | 30–50L |
| Multi-day trips | 3–5 nights | 50–70L |
| Extended trips | 5+ nights | 70L+ |
What size backpack for day trips (1-3 days)
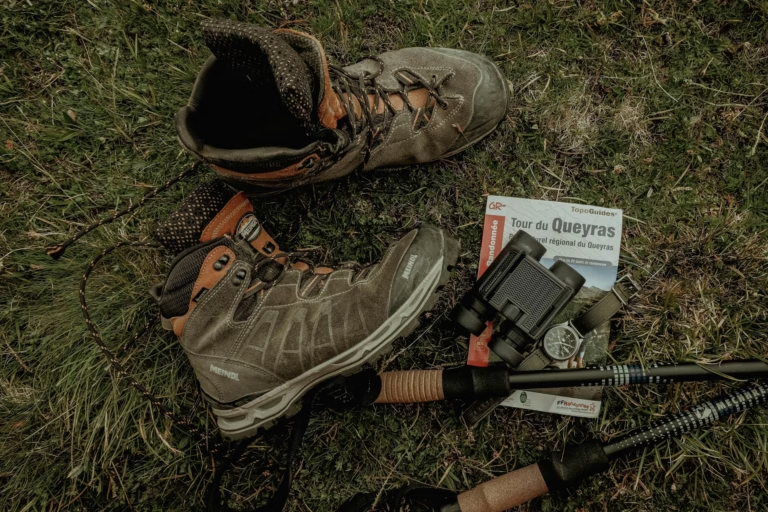
For shorter hikes, a 15–30L backpack is typically sufficient. This range comfortably fits essentials such as water, snacks, a lightweight jacket, navigation tools, and a small first aid kit.
The amount of gear you carry directly influences how large your pack needs to be, especially when following an essential day hiking gear checklist that includes safety items, extra layers, and emergency supplies.
Keeping your pack compact improves mobility and reduces fatigue, which is particularly important on technical or high-elevation trails.
What size backpack for weekend trips (1-3 nights)
For overnight or weekend trips, a 30–50L backpack provides the flexibility needed for additional gear without becoming overly bulky. At this stage, your pack needs to accommodate:
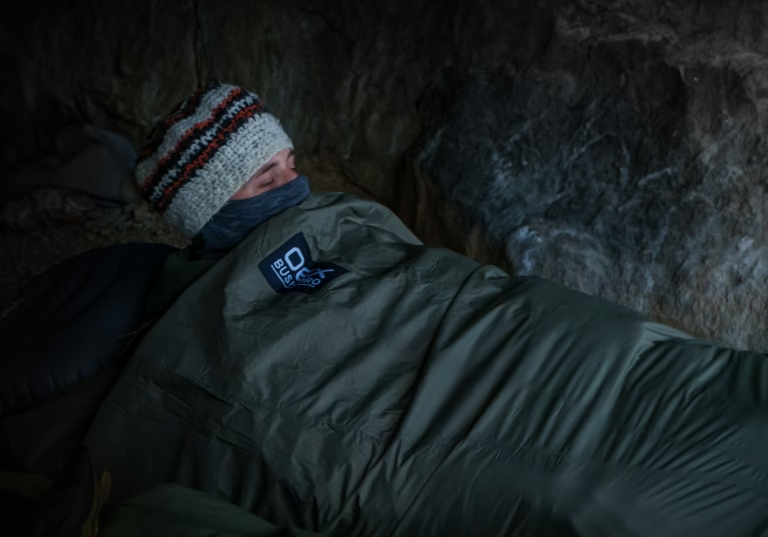
- A sleeping bag
- Extra clothing
- Food supplies
- Basic cooking equipment
The relationship between gear and backpack size becomes more evident when planning your loadout, particularly when considering how to prepare for a hiking trip, where packing strategy, food planning, and safety equipment all influence the volume you need.
What size backpack for multi-day trips (3-5 nights)
For multi-day hikes, a 50–70L backpack is generally the most suitable option. This size allows you to carry a full setup, including shelter, sleep system, cooking gear, and multiple days of food.
As pack weight increases, the importance of proper fit and load distribution becomes critical. A poorly balanced backpack in this category can quickly lead to fatigue, instability, and strain over longer distances.
What size backpack for extended trips (5+ nights)
For longer expeditions or winter hikes, a 70L+ backpack is often necessary. These packs are designed to handle heavier loads and provide additional storage capacity for bulky gear.
However, larger packs can encourage overpacking. Comparing different models and understanding their intended use cases becomes essential when selecting from the best hiking backpacks, especially for extended or demanding trips where comfort and durability are key.
How a backpack should fit
A backpack must fit correctly to keep the load stable and distribute weight efficiently across your body. When properly adjusted, most of the weight is transferred to your hips rather than your shoulders, which significantly reduces strain and fatigue during long hikes. Even a well-sized backpack will feel uncomfortable if the fit is incorrect, especially when carrying heavier loads.
A properly fitted backpack improves posture, balance, and energy efficiency, allowing you to move naturally across different terrains.
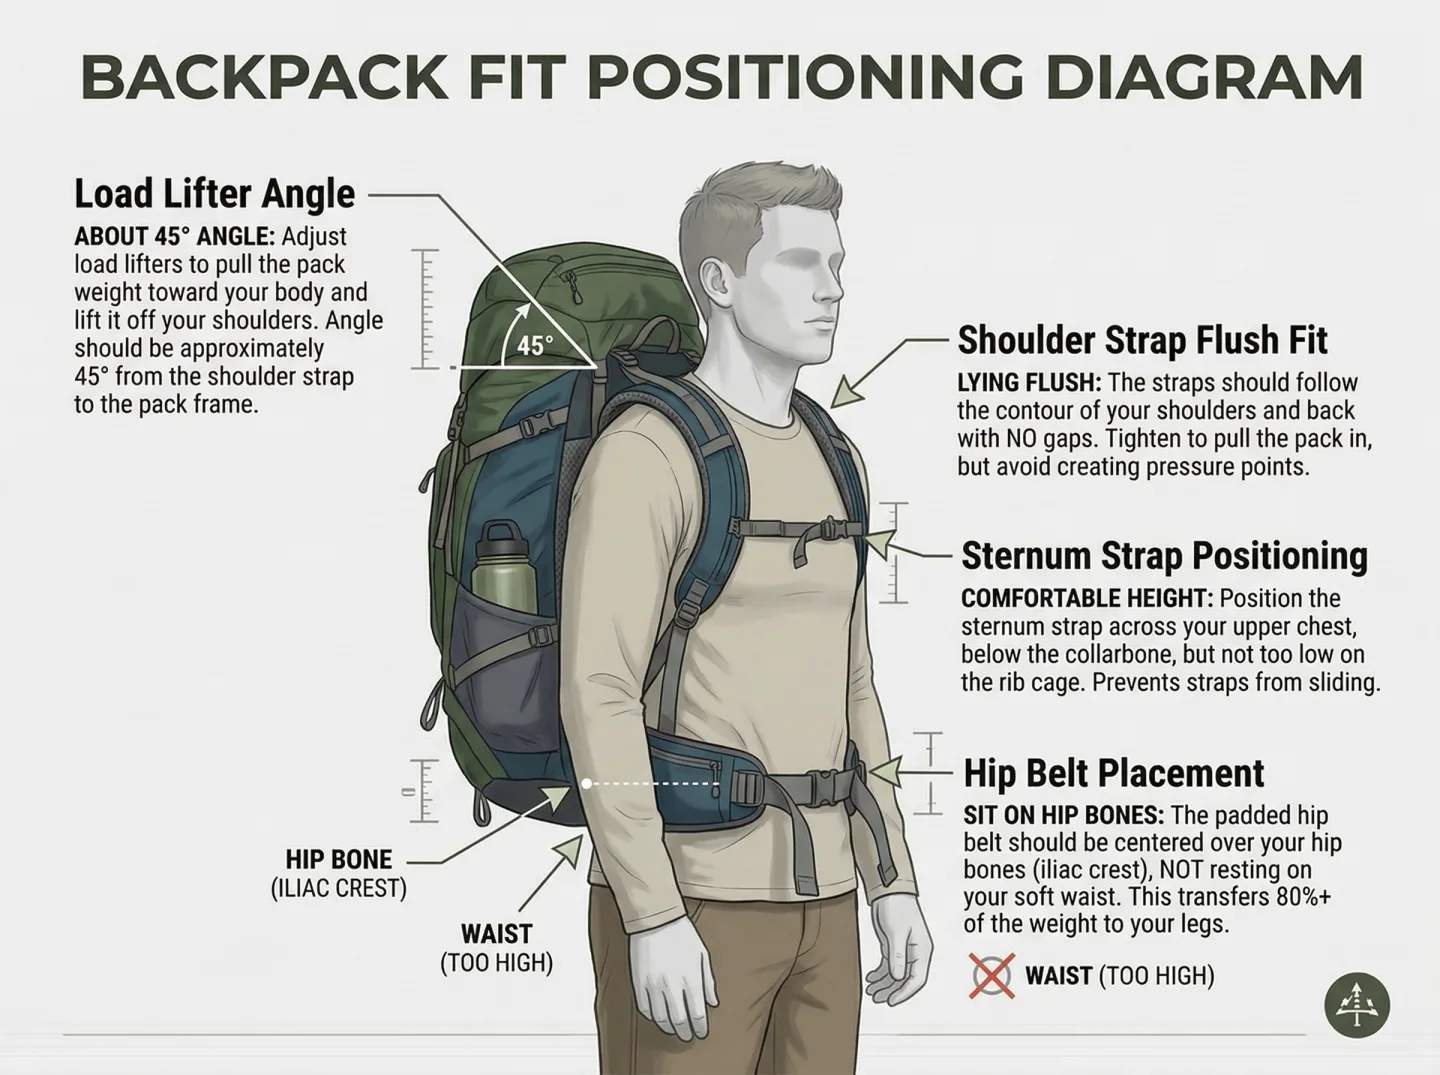
Hip belt position
The hip belt is the most important component of backpack fit because it carries the majority of the load. It should sit directly on your hip bones (iliac crest), not above your waist or below your hips.
When positioned correctly:
- Around 70-80% of the backpack’s weight is supported by your hips
- Your shoulders feel lighter and less strained
- Your posture remains more stable on uneven terrain
If the hip belt is too high or too low, the load shifts incorrectly, increasing fatigue and reducing control.
Shoulder straps fit
Shoulder straps should wrap snugly around your shoulders without leaving gaps between your body and the straps. They should follow the natural contour of your shoulders and sit flat against your body.
Key points:
- Straps should not carry most of the weight
- They should stabilize the pack rather than support it
- Tightening them excessively often indicates poor hip belt adjustment
A correct shoulder strap fit ensures that the backpack stays close to your body without pulling backward.
Load lifters angle
Load lifters are small straps located at the top of the shoulder straps that connect to the upper part of the backpack.
For optimal performance:
- They should form an angle of approximately 45 degrees
- They should gently pull the pack closer to your upper back
This adjustment improves balance, keeps the load centered, and prevents the backpack from leaning backward, especially when carrying heavier gear.
Sternum strap function
The sternum strap connects the two shoulder straps across your chest and helps stabilize the load during movement.
Its role includes:
- Preventing shoulder straps from sliding outward
- Improving overall pack stability
- Reducing upper body movement on uneven terrain
It should be adjusted so that it feels secure but does not restrict breathing or chest movement.
Signs your backpack doesn’t fit properly
A poorly fitted backpack creates noticeable discomfort and instability. Common signs include:
- Shoulder pain or pressure
- Hip belt slipping downward during movement
- A visible gap between your back and the backpack
- The load pulling backward and affecting balance
These issues often indicate incorrect sizing or poor adjustment. Over time, they can contribute to strain and discomfort, similar to patterns seen in common hiking injuries and how to avoid them, where improper load distribution is a frequent cause.
How to pack your backpack for better weight distribution
Packing your backpack correctly is essential for maintaining balance and reducing fatigue. Even a well-fitted backpack can feel uncomfortable if the weight inside is not distributed properly.
Proper packing helps:
- Keep your center of gravity stable
- Reduce strain on your back and shoulders
- Improve overall movement efficiency
Weight placement inside the backpack
The way you organize weight inside your backpack affects how the load interacts with your body. Instead of packing randomly, you should follow a structured placement approach based on weight and frequency of use.
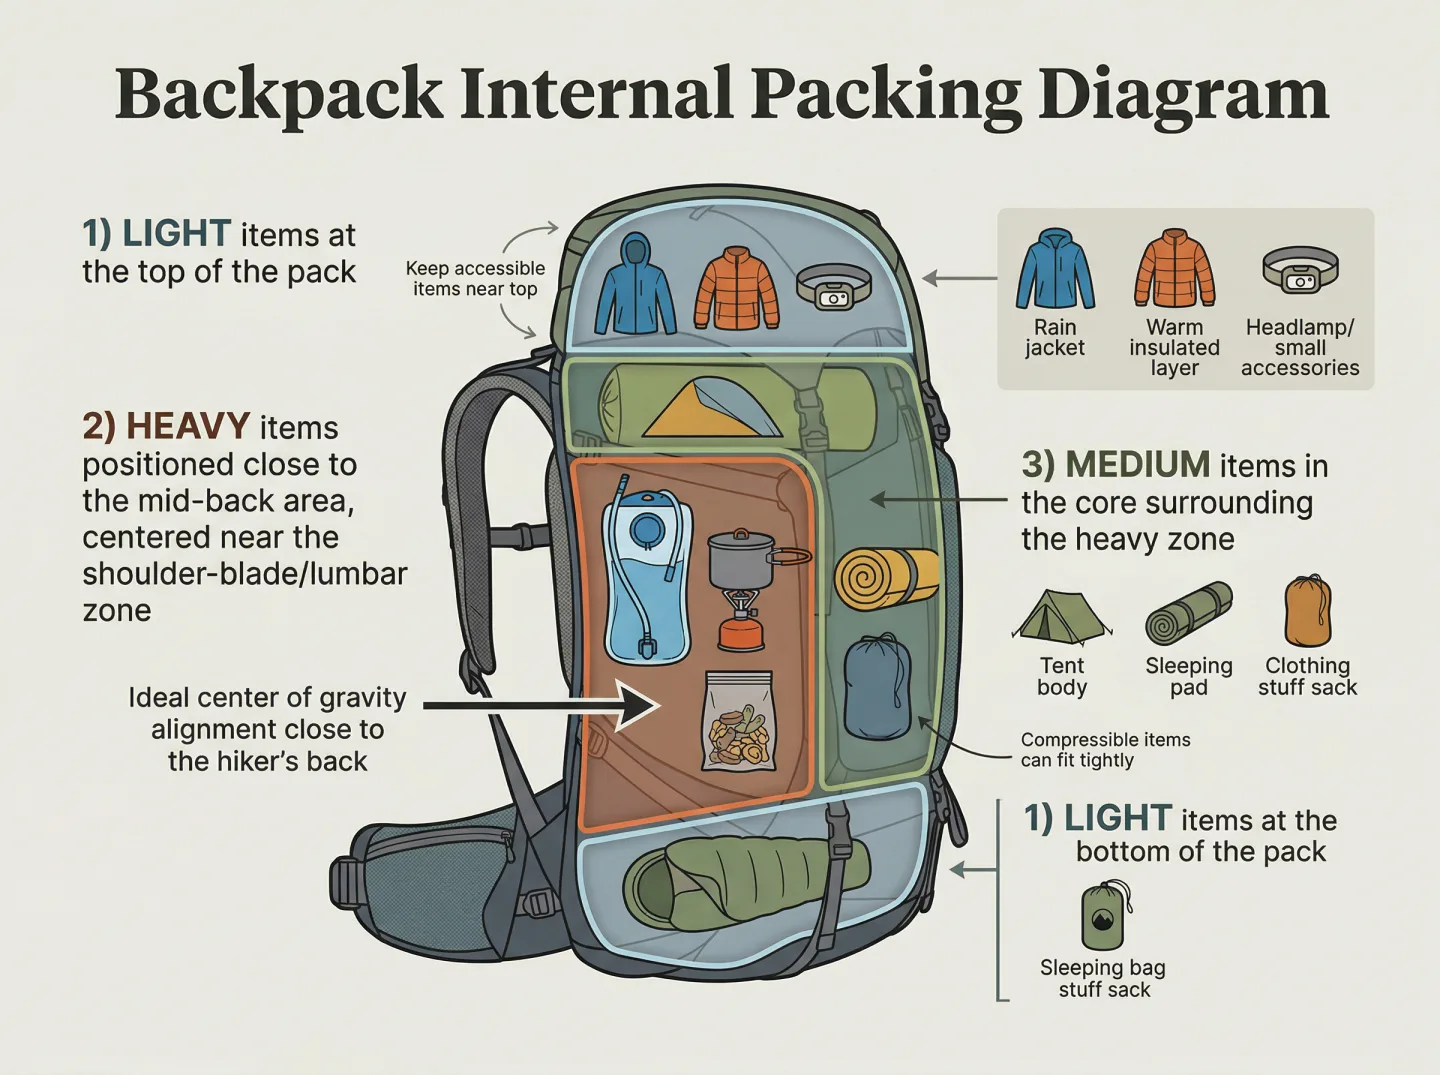
- Heavy items → close to spine, mid-back
Place dense items such as water, food, or cooking equipment in the center of the pack, as close to your spine as possible. This keeps the load aligned with your body and prevents backward pull.
- Medium-weight items → around the core zone
Clothing layers, tools, and frequently used gear should sit around the central area of the pack, helping distribute weight evenly without creating imbalance.
Clothing, tools, frequently used items
- Light items → top and bottom sections
Bulky but lightweight items such as sleeping bags or insulated layers can be placed at the bottom or top, filling space without affecting stability.
This structure ensures that the heaviest part of your load stays anchored near your center of gravity.
How packing affects balance and fatigue
The position of weight inside your backpack has a direct impact on how your body moves during a hike. When heavy items are placed too far from your back or too low in the pack, the load shifts your center of gravity backward or downward.
This leads to:
- Increased strain on the lower back
- Reduced balance on uneven terrain
- Higher energy expenditure with each step
By contrast, keeping weight centered and close to your spine allows your body to stay upright and balanced. This reduces the need for constant compensation, making your movement more efficient and less tiring over long distances.
How to test a backpack before buying
Testing a backpack properly means simulating real hiking conditions-not just trying it on empty in-store. A backpack that feels comfortable without weight can quickly become unstable or painful once loaded, especially on longer hikes or uneven terrain. The goal is to evaluate how the pack distributes weight, how it moves with your body, and whether it maintains stability under load.
A proper test helps you identify fit issues early, before they turn into discomfort or performance problems on the trail.
To accurately assess a backpack, follow a realistic testing sequence:
- Load the backpack with 8–15 kg: Use in-store weights or pack it with gear to simulate a real hiking load. Testing without weight does not reflect actual performance.
- Adjust all key contact points: Tighten the hip belt first, then shoulder straps, followed by load lifters and the sternum strap. This ensures proper weight distribution before evaluating comfort.
- Walk for at least 5–10 minutes: Move naturally, turn your torso, and if possible, walk on an incline or stairs to simulate trail conditions.
What to evaluate during the test
Focus on how the backpack behaves under movement rather than how it feels when standing still:
- Pressure distribution across hips and shoulders: Most of the weight should rest on your hips. If your shoulders feel overloaded, the fit or adjustment is incorrect.
- Load stability while walking: The backpack should stay close to your body without shifting side to side or pulling backward.
- Contact between your back and the pack: There should be consistent contact without large gaps, especially in the lower back area.
- Freedom of movement: You should be able to walk, turn, and step up without the pack restricting your motion or throwing off your balance.
Final thoughts
Choosing the right backpack comes down to making three clear decisions: how much gear you need to carry, how well the pack fits your body, and whether its features support your specific type of hike. Size alone is not enough-volume must match your gear, and fit must ensure that weight is transferred efficiently to your hips.
If your backpack feels stable, stays close to your body, and allows you to move naturally under load, you’ve chosen correctly. Prioritizing fit and function over size or appearance will have the biggest impact on comfort and performance on the trail.
FAQs
How to measure your torso length for a backpack?
Measure from the C7 vertebra (base of your neck) down to the top of your hip bones (iliac crest). This distance determines your correct backpack size and ensures the hip belt and shoulder straps align properly for weight distribution.
How can ventilation be improved in a backpack?
Ventilation is improved with mesh back panels, suspended systems, and airflow channels that create space between your back and the pack. These features reduce sweat and improve comfort during long hikes.
Why is a rain cover important for a backpack?
A rain cover protects your gear from moisture and prevents water damage. It also stops your backpack from absorbing water, which would increase weight and reduce comfort.
Is a 40L backpack enough for travel?
A 40L backpack is enough for weekend trips and light travel if you pack efficiently. It may not be sufficient for bulky gear or cold-weather conditions.